


You spent six hours in the kitchen last Saturday. You washed dishes three times. You ran out of vanilla extract halfway through your second recipe. And you ended up with only 15 jars of jam. Sound familiar?
Most home-based food vendors cook this way at first — jumping between products, running out of ingredients, and losing hours to disorganized prep. Batch cooking fixes all of that. It is the single biggest efficiency change you can make in your food business.
Batch cooking means producing all your products in one focused session instead of making small amounts throughout the week. You plan everything in advance, prep all your ingredients before you start cooking, and work through a production schedule from start to finish. The result is more product in less time, with less waste and more consistent quality.
The short version: Batch cooking is producing your food products in planned, focused production sessions instead of cooking small batches throughout the week. Pick one or two dedicated production days, write a prep sheet for every product, pre-measure all ingredients before you start, group similar tasks together, and package as you go. A well-organized production day can double or triple your output without adding hours to your schedule.
Batch cooking for a food business means cooking larger quantities of the same product in a single, planned production session. Instead of making 10 jars of salsa on Monday and 10 more on Wednesday, you make 30 on one production day and spend the rest of your week selling.
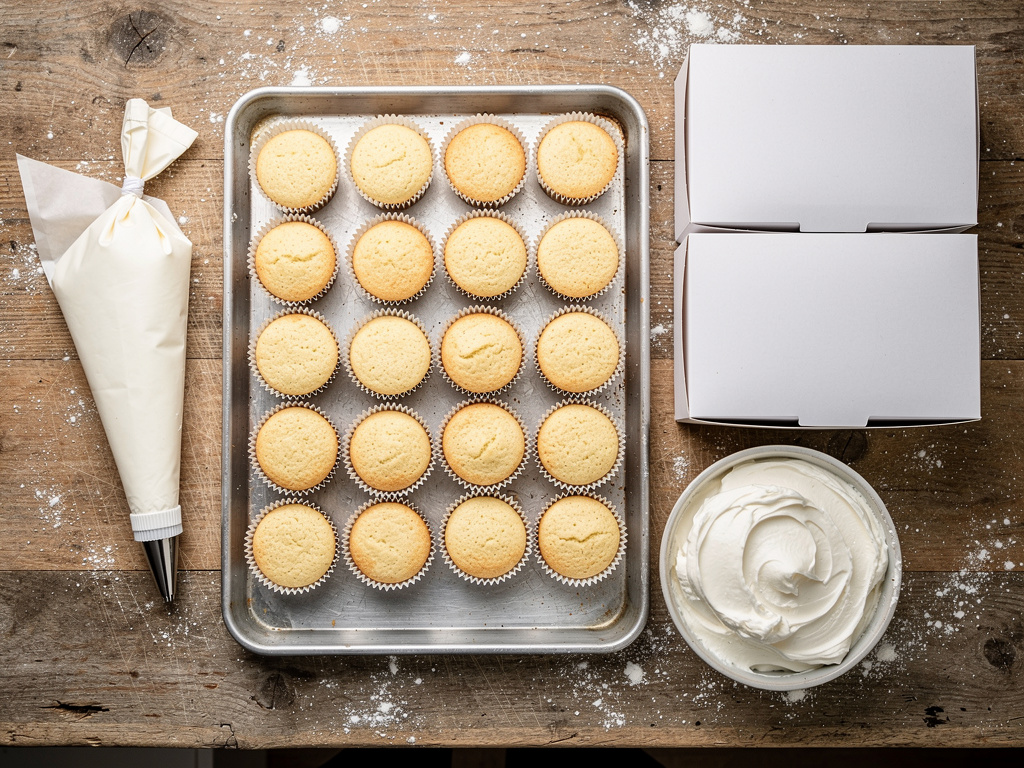
This is different from personal meal prep. When you meal prep for your family, you are making a variety of different dishes for the week ahead. When you batch cook for a business, you are making multiples of the same product — 40 cookies, 25 jars of jam, 30 bags of granola — using a repeatable process that produces consistent results every time.
The benefits show up immediately:
If you are cooking for sale, batch cooking is not optional — it is the most efficient way to produce food products at a scale that actually makes money. Here is why.
Chopping all your onions at once is faster than chopping onions for three separate recipes at three different times. Washing and drying all your jars in one pass is faster than doing it in small batches. This is called task batching, and it eliminates the constant switching between different types of work that eats up your production time.
A vendor who makes three products — granola, energy bites, and trail mix — can chop all nuts at once, measure all dry ingredients at once, and package all products in one session. That is 30 to 45 minutes saved just by eliminating task-switching.
When you plan your production around a set number of units, you buy exactly what you need. No half-used bags of brown sugar drying out in the pantry. No wilting herbs you bought for a recipe you never got to. Batch cooking with a prep sheet means every ingredient has a purpose and a destination.
Your customers expect your chocolate chip cookies to taste the same every week. When you batch cook, you use the same recipe, the same oven temperature, the same bake time, and the same ingredients in every session. That consistency is nearly impossible to maintain when you are cooking small amounts on random days with whatever is in the pantry.
This is the mindset shift that changes everything. When you batch cook, your week has structure. Monday is production. Tuesday through Saturday is selling, marketing, delivering, and restocking. You are never scrambling to cook and sell at the same time.
If you run a weekly food drop, this structure is essential. Your customers order by a cutoff, you produce everything in one session, and you deliver or set up for pickup on the scheduled day.
A successful production day starts days before you step into the kitchen. The planning is where the efficiency actually comes from.
Before you plan what to cook, know how much to cook. If you take pre-orders through a food drop or online storefront, you have exact numbers. If you sell at a farmers market, look at your sales from the last 3-4 weeks and use that as your production target.
Write down every product and the exact quantity you need. For example:
This is your production target. Everything else flows from these numbers.
A prep sheet lists every ingredient and its exact quantity for the batch size you are making. It also includes the equipment you need, the cooking time, and the cooling time. Think of it as your recipe scaled to your production target.
A good prep sheet includes:
A prep sheet approach reduces labor time by eliminating guesswork and ensuring everything you need is ready before you start cooking.
Once you have prep sheets for every product, line them up in order on a timeline. Put the longest-cooking items first so they can cook while you prep other products.
Example production schedule for a jam maker:
Without a schedule, that same production could easily take 8 or 9 hours.
Your kitchen layout directly affects how fast you work. Before your production day starts, set it up for efficiency.
Remove everything from your counters that is not part of today's production. Clear the sink. Empty the dishwasher. Take out the trash. Start with a clean, open workspace.
If you are cooking from a home kitchen, this also means moving personal items out of the way. Your production workspace should feel like a workspace, not a family kitchen. If you are a cottage food vendor selling from home, a clean and organized kitchen is part of safe food handling.
Mise en place is a French term that means "everything in its place." In a food business, it means measuring and prepping every ingredient before you turn on the stove or oven.
Line up your ingredients in the order you will use them. Put each product's ingredients in a separate area or on a separate sheet pan. When it is time to make strawberry jam, everything is already measured and ready. You just add and cook.
This single habit can save you 30 minutes or more per production day. No stopping to measure flour mid-recipe. No realizing you are out of baking powder after you already mixed the batter.
Set up your kitchen in a flow: prep area, cooking area, cooling area, packaging area. You should be able to move from left to right (or in a logical loop) without crossing back over your own path.
Even in a small kitchen, you can create this flow. Use a folding table for extra counter space if needed.
The most efficient production workflow follows a specific order. Here is the step-by-step process.
Do all your chopping at once. All your measuring at once. All your mixing at once. This is faster than completing one recipe from start to finish, then starting the next recipe from scratch.
If you are making three types of cookies, measure all the dry ingredients for all three batches first. Then cream all the butter and sugar for all three. Then mix everything together. You use the stand mixer once for three recipes instead of three separate times.
While cookies bake in the oven, make your stovetop items — sauces, jams, candies. While bread rises, prep your next product. Dead time is wasted time.
A good production day has something in the oven, something on the stove, and something being prepped at nearly all times. This is where your time-blocked schedule becomes critical — it tells you exactly when to start each task so everything stays synchronized.
Once your products are cooked, move them through cooling and packaging in order. The first product you cooked should be the first product you package. This keeps your workflow moving forward instead of jumping between random tasks.
Do not wait until everything is cooked to start packaging. As soon as a product is cooled to the right temperature, package it, label it, and move it to your storage area. This clears your cooling station for the next batch and ensures nothing sits out longer than it should.
Your labels should include the product name, ingredients, date of production, and any required cottage food disclaimer. If you are selling at a market or through a food drop, having everything labeled and ready to go before your selling day eliminates last-minute scrambling.
Food safety is not optional, and batch cooking introduces specific risks you need to manage.
The temperature danger zone is between 40 and 140 degrees Fahrenheit. Bacteria grow rapidly in this range. Your goal during production is to move food through this zone as quickly as possible — either by cooking it above 140 degrees or cooling it below 40 degrees promptly.
Key food safety rules for batch production:
You do not need a commercial kitchen to batch cook efficiently. Here is what actually speeds up production, listed by priority.
| Equipment | What It Does | Price Range | Buy First? |
|---|---|---|---|
| Sheet pans (half and full size) | Cooling, baking, organizing ingredients | $10-20 each | Yes |
| Digital kitchen scale | Consistent measurements, faster than cups | $15-25 | Yes |
| Instant-read thermometer | Food safety verification | $10-15 | Yes |
| Stand mixer | Hands-free mixing for doughs, batters, frostings | $200-350 | After 3 months |
| Food processor | Fast chopping, shredding, pureeing | $50-150 | After 3 months |
| Multiple timers | Track multiple products cooking at once | $5-10 each | Yes |
| Wire cooling racks | Faster cooling, better air circulation | $10-20 each | Yes |
| Folding table | Extra counter space for prep and packaging | $30-60 | When needed |
| Vacuum sealer | Longer shelf life, better storage | $40-80 | When needed |
| Label maker or printed labels | Professional packaging, faster labeling | $20-50 | After first month |
Start with the low-cost essentials — sheet pans, a scale, a thermometer, timers, and cooling racks. These cost under $80 total and make an immediate difference. Add the stand mixer and food processor once your production volume justifies the investment.
Batch cooking makes cost tracking easier because you produce a known quantity from a known set of ingredients.
After every production day, record three numbers:
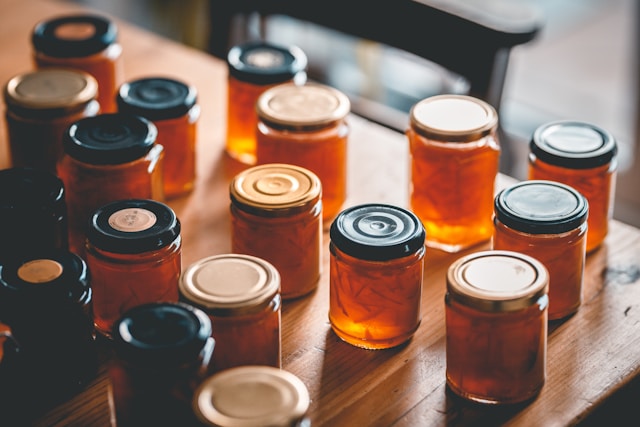
Example: You spent $48 on ingredients and produced 24 jars of jam. Your cost per unit is $2.00 per jar. If you sell each jar for $8, your gross profit is $6.00 per jar.
Tracking this after every production day helps you spot problems early. If your cost per unit is creeping up, you know to check ingredient prices or adjust your recipe. If your yield is dropping, you know something in your process is off.
This cost-per-unit number is also essential for pricing your products correctly. Without it, you are guessing.
Scaling production is not about working harder. It is about working smarter with the same kitchen and equipment.
Before adding a second production day, see if you can fit more into your current one. Review your schedule for dead time — moments where you are waiting for something to cook or cool. Those gaps can be filled with prep or packaging for additional products.
Most vendors find they can increase output by 30 to 50 percent simply by tightening their schedule and eliminating wasted time.
If your production day is running 8+ hours and you are still not meeting demand, it is time for a second day. Keep each day focused — baked goods on Monday, jams and sauces on Wednesday, for example. This reduces equipment switching and keeps your workflow clean.
When your home kitchen hits its limit, a shared commercial kitchen gives you more space, larger equipment, and the ability to produce products that may not be allowed under cottage food laws. Shared kitchens typically charge $15 to $30 per hour, and many offer equipment you would never buy for home use.
Signs you are ready for a shared kitchen:
If you are running a home baking business, a shared kitchen can be the bridge between cottage food and a full commercial operation.
These mistakes cost vendors hours of production time and sometimes entire batches of product.
Ready to start selling locally? The easiest way to take local orders and get paid is an online storefront — see the best platform to sell food from home, or set up a Homegrown storefront in about 15 minutes ($10/mo, 0% commission).
Start with 2-3 products per production day. Most home-based food vendors find that 3 products is the sweet spot — enough variety to meet customer demand without overwhelming your kitchen capacity. As your workflow improves, you can add a fourth or fifth product, but only if your schedule and kitchen space support it.
A well-planned production day for a home-based food vendor typically runs 4 to 6 hours for 2-3 products. This includes setup, prep, cooking, cooling, packaging, labeling, and cleanup. Without a plan, that same production can easily take 8 to 10 hours. The difference is entirely in the planning.
Yes. Batch cooking is how most cottage food vendors produce their products. As long as you follow your state's cottage food laws regarding allowed products, labeling, and sales limits, you can batch cook from your home kitchen. Check your state's specific rules to confirm what products are allowed and whether there are annual sales caps.
It depends on the product. Shelf-stable items like jams, granola, and cookies can be produced days or even weeks before selling. Baked goods like bread and muffins are best produced 1-2 days before your selling day for peak freshness. Perishable items should be produced the day before or the day of sale. Always label with the production date so customers and you know exactly how fresh each product is.
No. You can batch cook with standard home kitchen equipment — an oven, stovetop, basic pots and pans, and mixing bowls. The most impactful upgrades for under $80 are a digital kitchen scale, an instant-read thermometer, extra sheet pans, wire cooling racks, and multiple timers. A stand mixer and food processor are worth adding once your production volume grows past 20-30 units per session.
Store finished products according to their type. Shelf-stable items like jams, honey, and granola can be stored at room temperature in a cool, dry location away from direct sunlight. Refrigerated items must be kept below 40 degrees Fahrenheit at all times. Frozen items should be stored at 0 degrees or below. Always label with the production date and follow the first-in, first-out rule — sell the oldest stock first.
Batch cooking is how serious food vendors produce more product in less time. It is not complicated, but it does require planning. Start with a prep sheet, a time-blocked schedule, and 2-3 products. Perfect your workflow over 3-4 production days, and you will see the difference in your output, your consistency, and your bottom line.
Batch cooking works best when you know exactly what to make before you start — and that means pre-orders. Homegrown is $10/month with no percentage fees beyond standard payment processing and gives you a pre-order page where customers browse your menu, place their order, and pay before your production day. You walk into the kitchen with an exact order count instead of guessing. Compare that to managing orders through Instagram DMs where you are tracking quantities across 20 separate conversations, or Etsy where 6.5% per transaction eats into margins that are already tight on batch-produced food. Homegrown does not help you cook faster or plan your prep sheet — it eliminates the order management overhead so your production day is purely production.