You already own the best camera you need for your food business. It is in your pocket.
Vendors who post photos of their products consistently get more pre-orders, more foot traffic on market day, and more online orders. According to Snappr's food photography research, food businesses that include quality photos see up to 25% more conversions on their listings and a 30% increase in online orders. Those numbers hold whether you are selling artisan bread, homemade salsa, or fresh-cut flowers.
The good news is that you do not need professional equipment, a photography studio, or even a dedicated camera. Everything in this guide works with the phone you already carry. No budget required. No photography experience needed. Just a few simple techniques that take about two minutes once you know them.
If you are already using free marketing strategies to promote your food business, better photos will make every single one of those strategies work harder.
The short version: Natural light near a window or in open shade is all you need for great food photos. Shoot from overhead or at a 45-degree angle. Keep backgrounds simple — a wood cutting board or plain cloth works perfectly. Edit with your phone's built-in editor by brightening slightly, bumping up contrast, and cropping. Take five types of photos (hero product shot, booth display, process shot, customer interaction, and ingredient close-up) and reuse them across your online storefront, social media, and text messages.
---
Food photos are the single most effective way to turn someone scrolling past your post into someone placing an order. When a customer sees a photo of your golden-brown sourdough loaf or your lineup of pepper jelly jars catching the light, they are already imagining buying it.
The numbers back this up. Food businesses that add quality photos to their online listings see up to 25% higher conversion rates compared to text-only listings. Businesses with strong food photography report up to 30% more online orders. And 65% of customers say that visuals heavily influence their purchasing decisions.
For farmers market vendors specifically, this plays out in a very direct way. When you post a photo of your Saturday lineup in a Thursday evening text or Instagram post, that photo is what drives people to show up. Your photo is doing the selling before you even set up your booth.
Here is the part that should take the pressure off: you are not competing with professional restaurant photography. You are competing with the vendor down the row who does not post photos at all. A clear, well-lit photo taken with your phone is more than enough to stand out.
---
You need your phone and good light. That is the honest answer. Everything else helps but is not required.
Modern phones take photos that are more than good enough for social media posts, online storefronts, pre-order forms, and text message marketing. The camera in your pocket right now can produce better images than professional cameras could ten years ago.
Here is the single most impactful thing you can do before taking any photo: wipe your phone lens with your shirt. A smudged lens creates a hazy, soft look that no amount of editing can fix. This two-second habit will improve your photos more than any camera setting or editing app.
If you want to level up beyond the bare minimum, these inexpensive items make a noticeable difference:
You do not need a tripod, a ring light, a DSLR camera, or any photography gear. If someone tells you otherwise, they are not writing for vendors like you.
Good lighting is the difference between a photo that makes someone hungry and a photo that makes them scroll past. The good news is that the best light for food photography is free and available every day.
The simplest way to take a great food photo is to set your product near a window with indirect light. Not direct sun blasting through — that creates harsh shadows. You want the soft, even light that comes through a window when the sun is not directly hitting it.
Place your food between you and the window so the light hits the food from the side or slightly behind. Side lighting creates depth, shows texture, and makes colors look natural. This one technique — window light from the side — is what professional food photographers use in studios. They just pay a lot more for it.
Outdoor market lighting is actually great for food photos if you know where to stand:
Never use your phone's flash for food photos. Flash flattens food, washes out natural colors, and creates harsh shadows and reflections. There is no situation where flash makes food look more appetizing. If the light is too dim, move to a brighter spot instead.
Three angles cover virtually every type of food product. Once you know when to use each one, choosing becomes automatic.
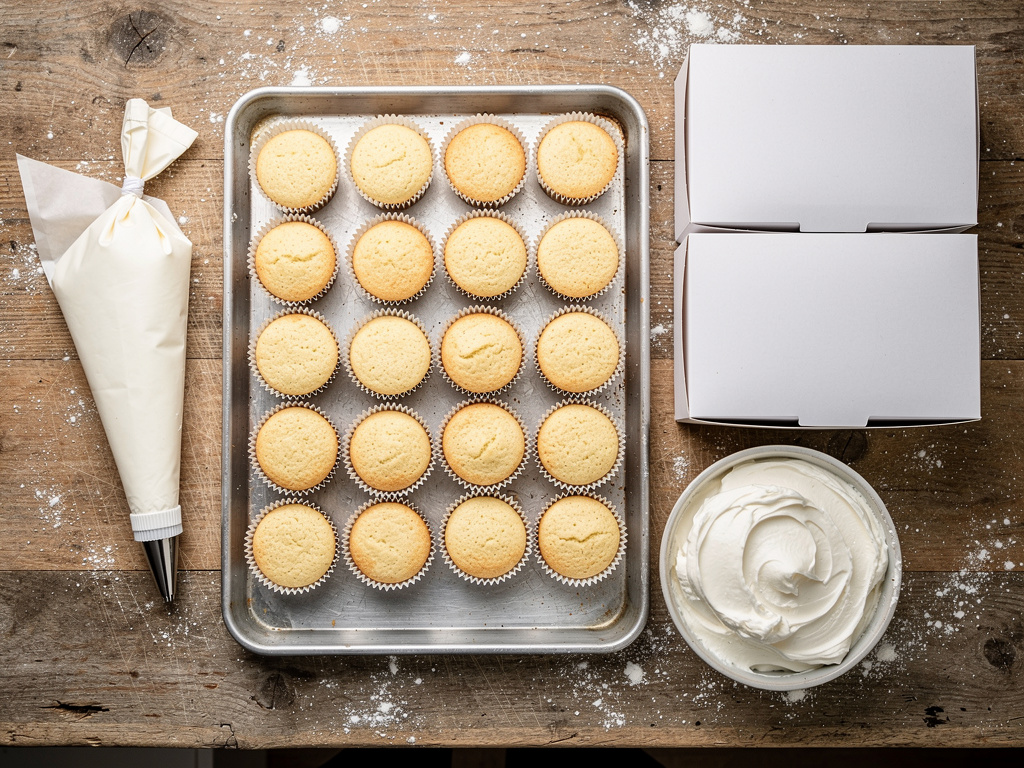
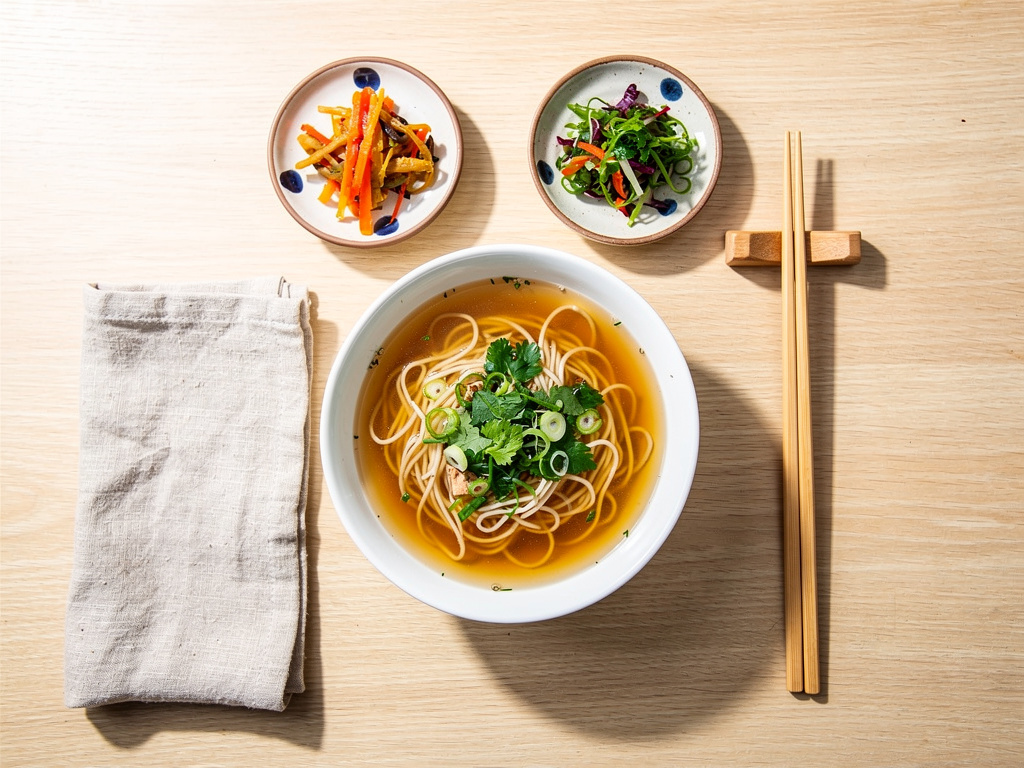
Hold your phone flat, parallel to the surface, looking straight down at the food. This angle works best for:
Tip: extend your arms fully and keep the phone level. If the phone is tilted, the photo looks skewed. Take a few shots and check — it is easy to accidentally angle slightly.
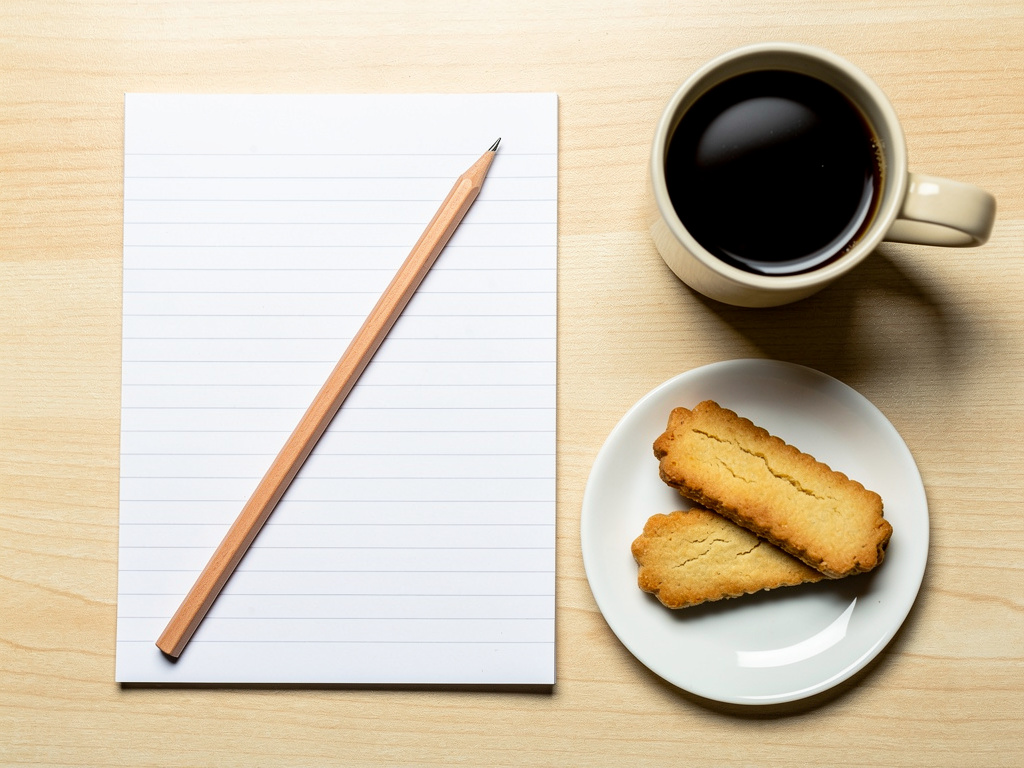
This is the most natural and versatile angle because it matches how you actually see food in real life. Hold your phone at roughly a 45-degree angle to the food — halfway between straight ahead and directly overhead.
This angle works best for:
When in doubt, use the 45-degree angle. It works for almost everything.
Hold your phone at the same height as the food, looking directly at it from the side. This angle works best for:
This angle emphasizes height and layers, so use it when those are the selling point of your product.
Food styling sounds fancy, but for vendors it comes down to one principle: keep it simple and clean. You are not creating a magazine cover. You are showing customers exactly what they will get when they order from you.
You probably already own a great photography background. These everyday items create clean, appealing surfaces for food photos:
Avoid busy patterns, brightly colored surfaces, or anything that competes with the food for attention.
Many vendors sell products in jars, bags, pouches, and boxes. Photographing packaged products is slightly different from photographing plated food, but the same basic principles apply.
You do not need to dig into complex camera settings. Three simple techniques handle 90% of what you need.
Tap on the food (not the background) on your phone screen so the camera focuses on the product. This tells your phone what the important subject is. Hold still for a second after tapping to let the focus lock. If you skip this step, your phone might focus on the background and leave the food slightly blurry.
After tapping to focus, you can adjust brightness:
Food almost always looks better slightly brighter than your phone's default exposure. A small brightness bump makes colors more vibrant and the overall photo more appealing.
Portrait mode blurs the background and makes the main subject pop. It works well for:
Do not use portrait mode for group shots, booth displays, or scenes with multiple products. The phone gets confused trying to figure out what to focus on and what to blur, and the result usually looks odd.
Editing food photos should take about 30 seconds. If you are spending more time than that, you are over-editing.
According to ExpertPhotography's smartphone food photography guide, the most effective approach is keeping edits minimal and natural. Here are the only three adjustments you need:
That is it. Three adjustments, 30 seconds, done.
Do not use heavy filters. Customers want to see what your product actually looks like. A photo that is over-saturated, overly warm, or run through an aggressive filter makes food look fake and can actually hurt your sales. The goal is "this looks delicious and real," not "this looks like a magazine ad."
You do not need hundreds of photos. Five types cover everything you need for your entire marketing operation. Take them once, reuse them everywhere.
| Photo Type | Best Angle | Where to Use | Update Frequency |
|---|---|---|---|
| Hero product shot | 45 degrees | Storefront listings, menus | When packaging changes |
| Process/behind-the-scenes | Eye level or overhead | Instagram Stories, social media | Weekly during production |
| Booth display | 10 feet back, eye level | Market announcements, Facebook | Each season or setup change |
| Customer/community | Eye level, candid | Social media, testimonials | Ongoing |
| Ingredient close-up | 45 degrees or overhead | Stories, product descriptions | Seasonal |
For tips on using these photos effectively, see our guide on Instagram tips for farmers market vendors.
One product, clean background, good natural light. This is your workhorse photo.
Your full setup at the market with products arranged and ready to sell.
You making the product — rolling dough, filling jars, arranging bouquets, pulling bread from the oven.
A customer holding your product, your booth with people browsing, a busy market scene.
Fresh ingredients, textures, a close-up of a label or packaging detail.
Taking great photos is only half the value. Using them in the right places is what drives sales. Here is a quick reference for matching photo types to marketing channels:
The same hero product shot can and should appear on your storefront, in your Thursday text message, on your Instagram, and in your pre-order form. Take one great photo of each product and use it everywhere.
Avoiding these common mistakes will immediately improve your photos more than any technique or app:
You do not need an elaborate photo session. This routine takes two minutes and gives you fresh content for the week:
Do this routine once a week and you will always have fresh photos ready for your social media, storefront, and customer messages. It gets faster every time — most vendors get it down to about 90 seconds after a few weeks.
Selling at markets or a farm stand? Let customers order ahead online. The easiest way to take local orders and get paid is an online storefront — see the best platform to sell food from home, or set up a Homegrown storefront in about 15 minutes ($10/mo, 0% commission).
No. Your phone is more than enough for social media, your online storefront, and pre-order marketing. The camera in a modern phone produces photos that are sharp, vibrant, and high-resolution enough for every marketing channel a food vendor uses. Focus your energy on lighting and composition, not equipment.
Early morning and late afternoon produce the warmest, most flattering natural light. Overcast days are also excellent because the cloud cover acts as a natural diffuser, eliminating harsh shadows. For farmers market vendors, the first hour after setup — before the crowd arrives — is the ideal window for both booth photos and individual product shots.
One to two good photos per product is enough to start. A clear hero shot on a simple background is the minimum for each product listing. If you have time, add an angled shot that shows the label or packaging from a different perspective. You can always add more photos later — do not let "I need more photos" keep you from listing your products.
Stick to basic adjustments: brightness, contrast, and cropping. Heavy filters make food look unnatural, and customers want to see what the product really looks like before they order. A lightly edited, natural-looking photo builds more trust and drives more sales than a heavily filtered one.
Take your booth display photo right when you finish setting up, before customers start arriving. For individual product shots, use a quiet corner of your booth or step to the side where your canopy creates shade. The two-minute routine works perfectly for this — set one product down, take a few quick shots, and you are done.
Yes, and you should. Your hero product shots work everywhere — your ordering page, Instagram feed, pre-order lists, text messages, and email previews. Taking one great photo per product and reusing it across all your channels is not lazy — it is efficient. Update your photos when your packaging changes or when you want a fresh seasonal look.
Shoot glass jars in open shade rather than direct sunlight to reduce glare. The 45-degree angle usually works better than overhead for jars because it avoids the reflection off the lid. If you still see a bright spot of glare, angle the jar slightly away from the light source until the reflection disappears. Clean glass jars with a lint-free cloth before shooting to avoid fingerprint smudges.
Your food tells a story. Good photos let your customers see that story before they ever visit your booth or place an order. The vendor with clear, appealing photos of their products will always outsell the vendor who relies on text descriptions alone.
Start simple. Take one great photo of your best-selling product this week using the two-minute routine. Post it. See what happens. Then do it again next week. Within a month, you will have a library of product photos that work across every marketing channel you use — and you will wonder why you waited so long to start.
Ready to put your new product photos to work? Set up your ordering page and start taking pre-orders with the photos you already have.